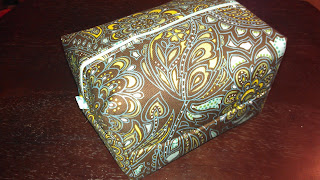
I wish I had time to be an extreme couponer, but alas I just can't make that kind of a time commitment. However, I've tried various methods of organizing my coupons, and I just couldn't find one that worked for me.
Here's what I've tried...
- Cheap plastic organizer that you could get at Walmart, Target, or the like. This didn't work because many of my coupons were too big to fit, and I didn't have enough dividers to really organize it the way I wanted.
- Three-ring binder with baseball card pages. I hated being the lady with the notebook of coupons and it took FOREVER to look through them this way. It was also a pain-in-the-neck to remove the expired coupons and to add new ones in a logical manner.
- Envelopes. I tried to keep all of my coupons in a series of envelopes organized the way I wanted them organized. This worked okay, but it was hard to keep up with all those envelopes.
The solution...
I was searching different websites for a coupon organizer that would work for me. I was willing to pay about $20 to get something that I thought I could really use. I found something similar to what I wanted on Amazon, but the cost was $30 and they were hideously ugly. Then, I thought I would search Etsy for them and they were outrageously cute and outrageously priced. So finally, I thought, "Hey, I have a sewing machine. What's keeping me from making my own?"
I found this great pattern over at YouCanMakeThis which has a front and back pocket, a flap on top to keep stuff from falling out, a pen holder, a key clip, and to top it all off, it can hang over the buggy handle which makes it ultra convenient. Oh, and did I mention CUTE! Combined with the help of my four-year-old son, who needs an occupation when doing major grocery shopping, this is the perfect couponing system for me. My son love to help, so he gets his own envelope and he is in charge of putting the coupons that we are going to use into his envelope. That way, when we get to the checkout, we have all of our coupons ready to roll.
Make your own coupon organizer. Don't be turned off of this project because of the unfortunate fabric choice of the pattern maker. You have to look beyond the superficial, and reserve judgement until you've created your own.
After I made this, I immediately had four people who wanted one too. So, I have now made five of these.
What I know now...
- The six-inch elastic is too long. Four to four-and-a-half inches would be about right.
- Use a pencil to mark your sewing paths on the fleece side of the pieces you will quilt. This makes it super easy to get a uniform pattern. If you want squares for your quilting pattern, I suggest using a clear plastic quilter's ruler to mark your path.
- Don't use ribbon with wire in it on the key chain part. I had a terrible time trying to get it to fold straight across. Instead, use a thin 1/2 inch or 3/4 inch ribbon without the wire.
- Use a rotary cutter, if at all possible, to cut these pieces. It saves a ton of time!


